Add Email to SSIS for troubleshooting

When your SSIS package fails, wouldn’t it be nice to receive an email with as much details as possible. Here are steps to setup this hidden gem.

Step 1. Setup the Event Handlers

  1. Click on the Event Handlers tab.
  2. Under the Event handler, select OnError
  3. Under the Executable drop-down-list, select the top most from the tree
  4. Click on the link

Step 2. Add the Send Mail Task

  1. From the SSIS Toolbox, drag the Send Mail Task into the Even Handlers canvas

Step 3. Setup the Email connection

  1. From the Connection Manager, right click in the white section and click on New Connection

Select SMTP and click Add…

Fill in the Name and SMTP server and click OK.

Step 2. Open up the Send Mail Task by double clicking on it

  1. Click on the Mail tab
  2. SmtpConnection: Click on the drop-down-list and select the connection you previously created
  3. Fill in the From, To fields with your emails. You can also use Expression for this but in this example, we’re going to hard code the emails

Click on the Expressions tab

You’ll want to do this step for the Message Source and Subject

Copy and Paste these to the respective Expression. When you’re done, click OK.

Message Source

“Machine Name: ” + (DT_STR, 2000,1252)  @[System::MachineName] + “\r\n” +

“Package Name: ” + (DT_STR, 2000,1252)  @[System::PackageName] + “\r\n” +

“User Name: ” +  (DT_STR, 2000,1252)  @[System::UserName] + “\r\n” +

“Source Name: ” + (DT_STR, 2000,1252)  @[System::SourceName] + “\r\n” +

“Source Description: ” +  (DT_STR, 2000,1252) @[System::SourceDescription] + “\r\n” +

“Error Code: “+ (DT_STR, 2000,1252) @[System::ErrorCode]   + “\r\n” +

“Error Description: ” + (DT_STR, 2000,1252)  @[System::ErrorDescription] + “\r\n”

Subject

“** Error Msg from OnError Event Handler *** ” +  ” SSIS Package Name:  [” +  @[System::PackageName] +  “] ” + “; Machine Name: ” + @[System::MachineName]

Proof is in the pudding!

Here’s a look at how it looks like when an error occurs. You’ll get an email telling you which Package and Task failed. Keep in mind that you no longer need to go to SQL Job History, SSIS Catalog,  Event Viewer to view the errors. The errors will come to you via email! Sweet Jesus!

As always, I hope this helps.

SQL Server Alert System: ‘Severity Level 020: Error In Current Process – High’

I get this very vague Alert in a weekly basis and it was driving me nuts. I reached out to the IT Network/OS for months to see if they could pin down the issue and were not able to find anything on their logs. I provided an Event Handler Email Task to the developers to put inside their SSIS Packages and when I would get Severity Level 020 Alerts, I would now see their Packages. The common errors are

  • Named Pipes Provider: The specified network name is no longer available.
  •  

    A fatal error occurred while reading the input stream from the network. The session will be terminated

  • The prelogin packet used to open the connection is structurally invalid; the connection has been closed. Please contact the vendor of the client library. [CLIENT: <named pipe>]
  • Length specified in network packet payload did not match number of bytes read; the connection has been closed. Please contact the vendor of the client library.
  • SSIS Error Code DTS_E_INDUCEDTRANSFORMFAILUREONERROR.  The “OLE DB Destination.Inputs[OLE DB Destination Input]” failed because error code 0xC020907B occurred, and the error row disposition on “OLE DB Destination.Inputs[OLE DB Destination Input]” specifies failure on error.
  • Communication link failure

It did not matter when the Job ran (on a schedule, manual, Visual Studio Data Tools), it would still randomly fail. Most of these SSIS are straight forward where they pull 5 million records from Teradata to SQL– Just a straight SELECT * FROM Table (these tables are the final product of an ETL performed in Teradata). Then one day, I get a new error “Communication link failure” so I Googled it and here’s where it lead me to https://support.microsoft.com/en-us/help/942861/general-network-error-communication-link-failure-or-a-transport-level

I ran the command “Netsh int tcp show global” to see the following

In lamens term, Receive-Side Scaling is like the waiter directing traffic at a Food Buffet. The line can only move as fast as the waiter can find you a table. If you disable Receive-Side Scaling, it’s Free For All. You have eyes and the stranger next to you have eyes and you both can find an empty table without the help of the waiter therefore there’s no wait or less wait. Here’s a link to a more technical term https://docs.microsoft.com/en-us/windows-hardware/drivers/network/introduction-to-receive-side-scaling

After I disabled Received-Side Scaling (Network Adapter -> Properties -Configure.. -> Advanced -> and increased the SQL (Properties -> Advance) Remote Login Timeout from 20 to 35,  the SSIS Packages began to run without Severity Level 020.

I hope this helps someone that is experiencing the same issue.

The requested OLE DB provider Microsoft.Jet.OLEDB.12.0 is not registered

You’re probably getting this error message in BIDS/Data Tools

Error 1 Validation error. Data Flow Task: Package1: The requested OLE DB provider Microsoft.Jet.OLEDB.12.0 is not registered. If the 32-bit driver is not installed, run the package in 64-bit mode. Error code: 0x00000000. An OLE DB record is available. Source: “Microsoft OLE DB Service Components” Hresult: 0x80040154 Description: “Class not registered”. Package1.dtsx 0 0

The issue here is that your computer is 64 bit and both versions (32 bit and 64 bit) of Excel are installed. By installing Microsoft Access Database Engine 2010 Redistributable your issue should go away but this alone did not work for me.

What worked for me is to also install 2007 Office System Driver: Data Connectivity Components which corrected the Microsoft.Jet.OLEDB.12.0 issue.

File Type (extension)                                                        Extended Properties
———————————————————————————————
Excel 97-2003 Workbook (.xls)                                      “Excel 8.0”
Excel 2007 Workbook (.xlsx)                                         “Excel 12.0 Xml”
Excel 2007 Macro-enabled workbook (.xlsm)            “Excel 12.0 Macro”
Excel 2007 Non-XML binary workbook (.xlsb)         “Excel 12.0”


I hope this helps solve your issue.

Conditional Split

Use Conditional Split if you need to separate the data from a source (Flat File, Excel, Table, etc.) into multiple destinations (Flat File, Excel, Table, etc.)

Step 1: Drop a Data Flow Task to the Control Flow

1
Data Flow Task

Step 2: Create 4 Flat File Connections. The first flat file is your source. You can use OLE, ODBC, etc.

This second flat file is for my all .txt data

This third flat file is for my all .cs data

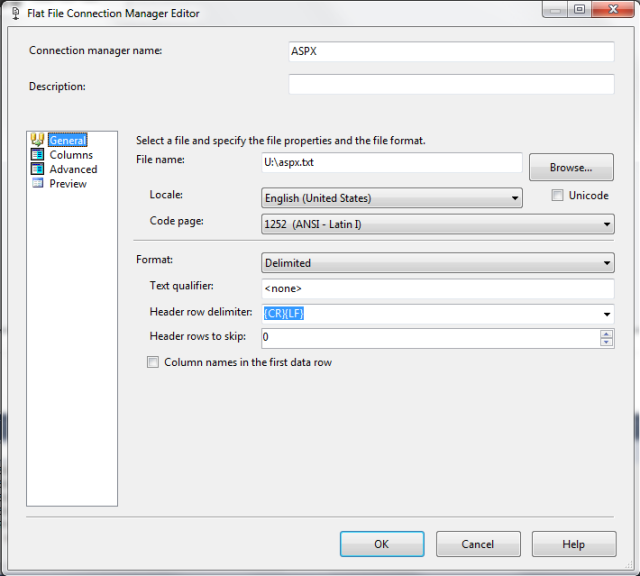
This fourth flat file is for my all .aspx data

2
File File Connection Manager Editor Input File
3
Flat File Connection Manager Editor Output Text File
4
Flat File Connection Manager Editor Output CS File
5
Flat File Connection Manger Editor Output ASPX File

Step 3: Drop a Flat File Source into the Data Flow

6
Flat File Source

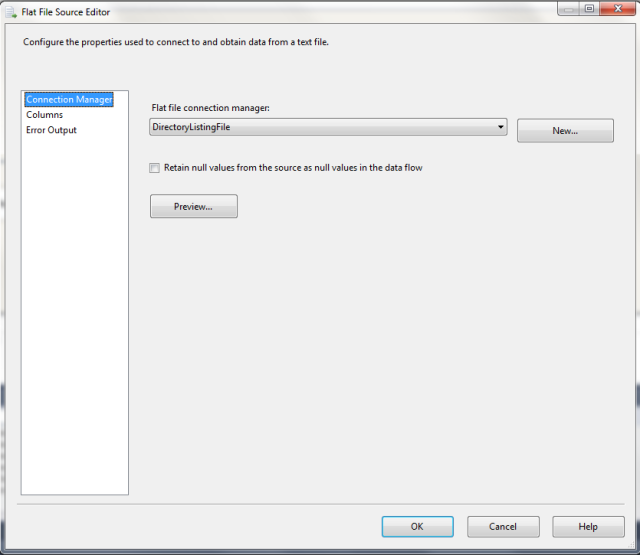
Step 4: Double click on the Flat File Source and establish the connection by selecting your source file.

7
Flat File Source Editor Connection Manager

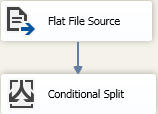
Step 5: Drop a Conditional Split into the Data Flow. Drag the arrow from the Flat File Source to the Conditional Split.

8
Conditional Split

Step 6: Double click on the Conditional Split and create three conditions.

9
Conditional Split Transformation Editor

Step 7: Drop three Flat File Destination onto the Data Flow

10
Three Flat File Connections

Step 8: Drag the arrow from the Conditional Split onto one of the Flat File Destination. An Input Output Selection dialog will popup. Select one of the output.

11
Input Output Selection

Repeat this step for all Flat File Destination.

12
Repeat the connection to all three Flat File Connections

Step 9: Double click on the Flat File Destination and select the connection. Repeat this process to the other two Flat File Destination

13
Flat File Destination Editor

Step 10: Run the SSIS package and now you’ll have all three files with specific file types in them.

In this example, I’m using Flat Files but you can use Excel, ODBC, CSV, etc. The process is the same– just the connection setup is different.

ForEach Loop Container

When you need to read through a file directory and save all of the file names to a text file, follow these steps.

Step 1: Create a variable to hold the file name that the ForEach Loop reads

Step 2: Create a Flat File Connection

2
File Connection Manger

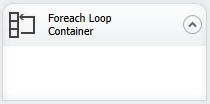
Step 3: Drop a “Foreach Loop Container” to the Control Flow

3
Foreach Loop Container

 Step 4: Rename the “Name” text to something more meaningful

4
Foreach Loop Editor General

Step 5: In the Enumerator drop-down, select “Foreach File Enumerator” and pick the folder path. Note: If you check “Traverse subfolders”, the Foreach loop will go through all subfolders.

5
Foreach Loop Editor Collection

Step 6: We need to save our results to a variable if we want to know what files were scanned. Under the “Variable” drop-down, select “User::MyFileName”

6
Foreach Loop Editor Variable Mappings

 Step 7: Drop a “Script Task” into the Foreach Loop Container.

7
Script Task

Step 8: Double click on the “Script Task”. In the “ReadOnlyVariables”, select “User::MyFileName”. Click on “Edit Script”

8
Script Task Editor Script

Step 9: Add the following C# code

public void Main()
{
ConnectionManager cm = Dts.Connections[“Output”];

string content = Dts.Variables[“User::MyFileName”].Value.ToString();

string fileDirectory = cm.ConnectionString;

System.IO.File.AppendAllText(fileDirectory, content + “\r\n”);

Dts.TaskResult = (int)ScriptResults.Success;
}

 Now run your SSIS and once completed, open up the Output.txt file to see the results.